15 Stunning DIY Christmas Decorations That Look Incredibly High-End

I absolutely adore that feeling when the first chill hits the air.
It makes me want to fill my home with twinkling lights and cozy textures. But browsing decor stores can feel a bit disheartening.
Everything beautiful seems to have a hefty price tag. That’s why I love turning to beautiful DIY Christmas decorations. They let me create that luxurious holiday magic I crave.
All without breaking the bank.
This year, let’s make things that feel special. Projects that look like they came from a high-end boutique, not a craft store bin.
DIY Christmas Decorations
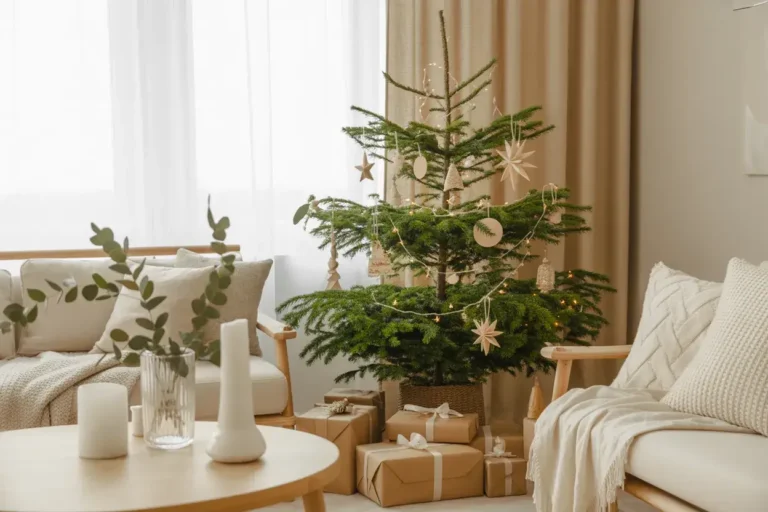
1. Luxe Velvet Ribbon Bows for the Tree

Forget those stiff, perfect bows from a bag.
This look is about soft, touchable elegance. I imagine thick velvet ribbons in gorgeous colors. Think emerald green or deep, moody burgundy.
You just tie them in simple bows.
Let the long ends drape gracefully down your tree branches. The texture catches the light so beautifully. It instantly makes your entire tree feel more decadent and rich.
A Budget-Friendly Tip: You don’t need the most expensive ribbon. Look for wide, single-sided velvet ribbon online or at fabric stores. You get the same luxe look for a much better price.
2. A Sweet-Smelling Dried Orange Garland

This is one of my favorite DIY Christmas decorations.
It fills your whole house with the most incredible scent. It smells like pure holiday cheer.
Picture thin slices of oranges baked slowly. They turn into beautiful, translucent jewels of amber and gold. String them together on twine. I love adding chunky wooden beads and fragrant cinnamon sticks between the slices.
Drape this over a mirror or a doorway.
It adds a warm, old-world charm that feels both rustic and refined. Plus, it’s a completely natural decoration.
Perfect Slices Every Time: For even slices, chill your oranges in the fridge for about 30 minutes first. Use a very sharp serrated knife or a mandoline for the best results. This ensures they all dry at the same rate.
3. A Modern Minimalist Gold Hoop Wreath

This is not your grandmother’s big pine wreath.
This project is all about chic simplicity. Start with a thin, simple metal hoop in a gold finish. You can find these at any craft store.
Secure a small, asymmetrical bunch of greenery to one side. Fragrant eucalyptus or pine sprigs work wonderfully. Add a few sprigs of winter berries for a pop of color.
Finish it with one long silk ribbon.
I love a soft cream or blush pink color. It’s airy, it’s elegant, and it looks incredibly stylish on a front door or a blank wall.
Make It Last: To create a wreath you can use year after year, opt for high-quality faux eucalyptus and berries. The look is just as beautiful, but you won’t have to worry about it drying out and becoming brittle.
4. A Whimsical Forest of Gilded Paper Mache Trees

Let’s create a tiny, magical forest for your mantel.
This project is so much fun and very forgiving. You just need some basic cardboard to shape into cones of various sizes. Then, cover them in a few layers of papier-mache.
Don’t worry about making them perfect.
A little texture adds to the charm. Once they’re dry, paint them in soft winter whites, grays, and mossy greens. The final touch is the most important part.
Add a tiny bit of gold leaf to the tips.
Grouped on a sideboard or shelf, they look like a sparkling little woodland scene straight from a storybook.
Create a Stable Scene: To keep your trees from toppling, add a little weight to the base before you start. A small handful of dry beans or rice glued inside the bottom of the cardboard cone works perfectly.
5. Moody Stars Folded from Antique Book Pages

Here’s how to give old, forgotten books a beautiful new purpose.
This is a quiet and charming Christmas craft. I find my books at thrift stores or flea markets. Look for ones with lovely, yellowed pages.
Carefully tear the pages out.
Fold them into simple 3D star shapes. There are tons of easy tutorials you can find online for this part. The aged paper adds so much character.
You can string them into a delicate garland.
I hang mine on my bookshelf. Or you can just place a few among your other holiday decorations. They add a touch of bookish warmth to any cozy corner.
Choosing the Right Book: Look for books with stitched binding, not glued ones. The pages are much easier to remove without tearing. Novels from the 70s and 80s often have that perfect, aged paper color.
6. Sparkling DIY Mercury Glass Ornaments

You can get the stunning look of vintage mercury glass ornaments at home.
It just takes one simple trick.
Start with a pack of clear glass ornaments. Give them a good cleaning first. Then comes the magic. A light spritz of looking glass spray paint on the inside of the ornament.
Swirl it around a bit.
As it dries, it creates that beautiful, mottled, silvery finish. They truly look like expensive heirlooms you’ve lovingly collected for years. They glitter so beautifully between the tree branches.
The Secret to the Spots: After you spray the inside, give the ornament a light spritz with a mixture of one part vinegar to one part water. This makes the looking glass paint bead up, creating that classic mottled mercury glass effect.
7. A Soft Felt Mistletoe Ball with Pearl Berries

This is such a sweet, modern take on a holiday classic.
It feels much softer and more handmade than the plastic versions. Cut out simple leaf shapes from a soft, olive-green felt.
You’ll need a lot of them.
Using a hot glue gun, attach the leaves all over a foam ball. Overlap them to create a full, leafy texture. For the berries, use tiny cream-colored pearl beads.
Sew or glue them on in little clusters.
Hang it from a doorway with a wide, beautiful satin ribbon. It’s a decoration that truly feels like it was made with love and care.
Making It Fuller: For a more dimensional and realistic look, use two slightly different shades of green felt for your leaves. Alternate them as you glue them onto the foam ball. It adds a subtle depth that looks fantastic.
8. Gifts Wrapped in Patterned Furoshiki Fabric

Let’s turn the presents under the tree into décor themselves.
Furoshiki is the Japanese art of wrapping objects in fabric. It’s sustainable and gorgeous. It makes each gift feel incredibly special.
Find some pretty fabrics with subtle patterns. Think small winter florals or simple geometric prints in holiday colors. Wrapping your gifts this way is easy to learn. It’s also a unique look.
It’s also a bonus gift!
Your loved ones can reuse the beautiful fabric for years to come.
Where to Find Fabric: You don’t need to buy expensive bolts of fabric. Check out the remnant bin at your local fabric store. You can also find beautiful, inexpensive cloth napkins or even vintage scarves at thrift stores.
9. Aromatic Mulling Spice Sachets

These little bundles are décor you can actually smell.
They make your entire home smell like Christmas. Fill small muslin or linen pouches with a fragrant mix. I love using whole cinnamon sticks, cloves, star anise, and dried orange peel.
Tie them shut with a piece of twine. Or use a small scrap of velvet ribbon for a luxe touch.
You can hang these on the tree.
They also look lovely on doorknobs or collected in a bowl on your coffee table. The gentle, spicy scent is so welcoming during the holidays. This is a wonderful DIY Christmas decoration to make with friends.
Boost the Scent: To make the sachets even more fragrant, gently crush one or two of the star anise pods and cloves with the back of a spoon before adding them to the bag. This releases their essential oils.
10. A String of Gingerbread People Garland

This project is pure, happy nostalgia.
It’s so cheerful and sweet. Bake a batch of your favorite gingerbread people. But before you put them in the oven, poke a small hole through each of their hands with a skewer.
Decorate them with simple white icing.
Once they’re completely cool, you can thread a piece of red and white baker’s twine through their hands. It will look like they are all holding hands in one long, happy chain. It’s perfect for the kitchen.
Sturdy and Sweet: For a garland that holds up well, use a gingerbread recipe that’s designed for building houses, not just for eating. The cookies will be a bit harder and less likely to break when you hang them.
11. Clear Baubles Filled with Shimmering Pearls

This is one of the easiest handmade Christmas decorations.
But it makes such a huge impact. All you have to do is buy a set of simple, clear, fillable ornaments from a craft store.
Then, find your filler.
I love using tiny faux pearls or opalescent beads. You can find bags of them in the jewelry-making aisle. Carefully fill each ornament. The way the light catches their pearly shine is just magical.
It’s a touch of glam that is still very understated.
Add Some Variety: For a more dynamic look on your tree, make a few different versions. Fill some with pearls, some with small white feathers, and others with delicate shreds of gold leaf. They will look stunning together.
12. A Minimalist Linen Pouch Advent Calendar

Create a beautiful Advent calendar you can use for years.
This feels so much more personal than a store-bought one. Sew 24 tiny pouches from natural-colored linen fabric. A simple drawstring design is perfect.
Then, add the numbers from 1 to 24.
You can use a fabric stamp and ink for a rustic look. A fine-tipped permanent fabric pen also works for a clean, modern style. Hang them with mini clothespins on lines of twine attached to a wooden dowel.
It’s clean, textural, and so special.
No-Sew Option: If sewing isn’t your thing, you can buy pre-made small linen or muslin drawstring bags. This turns the project into a simple 15-minute craft of just adding the numbers and hanging them up.
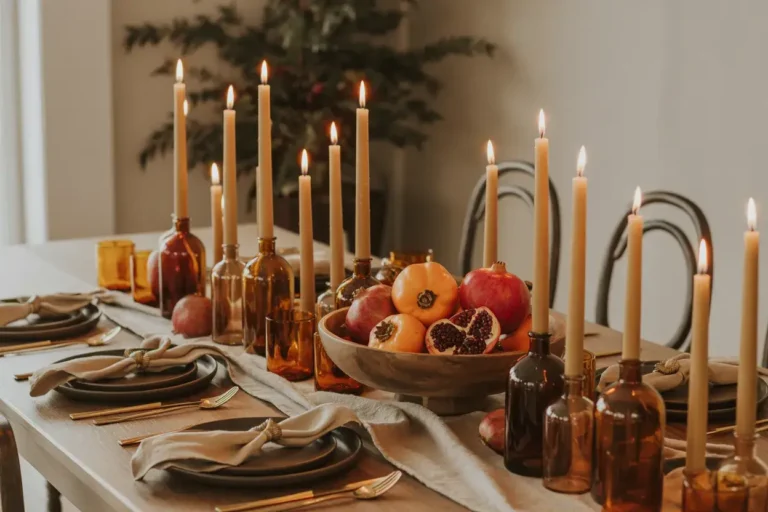
13. Pinecones with Delicate Gold Leaf Tips

Let’s go on a winter walk for this project.
Foraging for pinecones is half the fun. After you get them home, make sure you clean and dry them completely. Then, gently brush a bit of adhesive onto the very tips of the scales.
Press on delicate flakes of gold leaf.
This tiny touch of metallic shine elevates a humble pinecone. It becomes a gorgeous, natural piece of decor. They look amazing scattered down the center of a dining table. I also love placing one on each dinner plate.
Prepping Your Pinecones: To clean your foraged pinecones and get rid of any critters, bake them on a foil-lined sheet at 200°F (95°C) for about 30-45 minutes. Let them cool completely before you start crafting.
14. A Falling Cascade of 3D Paper Stars

Imagine a flurry of stars, frozen in mid-air.
You can create this breathtaking visual with just paper. I suggest using sturdy cardstock in white, cream, or even a soft metallic silver.
Craft about a dozen 3D stars.
Make them in various sizes for a more natural look. Hang them with clear fishing line from the ceiling. They look amazing in a corner, over a sideboard, or above a dining table.
Hang them at different lengths.
This creates a dreamy, dramatic waterfall of stars. It’s pure magic.
Star-Making Made Easy: Don’t try to freehand this! Find a good 3D star template online and print it out. Tracing the template onto your cardstock will ensure all your points are sharp and your stars look uniform and beautiful.
15. Cozy Embroidered Felt Stocking Tags

This is a small detail that adds a huge amount of warmth.
Make your family’s stockings feel extra special. Cut out simple tag shapes from thick felt. I love using colors like oatmeal, charcoal gray, or forest green.
Use a contrasting color of embroidery floss.
Stitch each person’s initial using a simple backstitch. You can even add a tiny snowflake or star. It’s a thoughtful touch that adds so much personality and love.
These are the details people remember.
Neat Stitches Tip: Don’t know how to embroider? No problem. Lightly draw the initial onto the felt with an erasable fabric pen. Then, simply use a basic running stitch to trace the letter. It’s easy and looks just as charming.
Filling a home with things you’ve made by hand is a special kind of joy.
It’s about more than just saving money. It is about infusing your space with your own creativity and love. It makes the season feel that much more personal and bright.
I hope these ideas inspire you to get crafting.
Which of these DIY Christmas decorations are you most excited to try this year? Let me know in the comments below